Complete Anatomy
Instalación manual de Windows – SCCM
1.
Haga clic aquí para descargar la última versión de Complete Anatomy.
2.
Ve a la carpeta donde descargaste el archivo (normalmente Descargas).
3.
Haz clic con el botón derecho en el archivo y selecciona Extraer todo... (Asegúrate de que la opciónMostrar los archivos extraídos al finalizar esté marcada). Luego haz clic en Extraer.
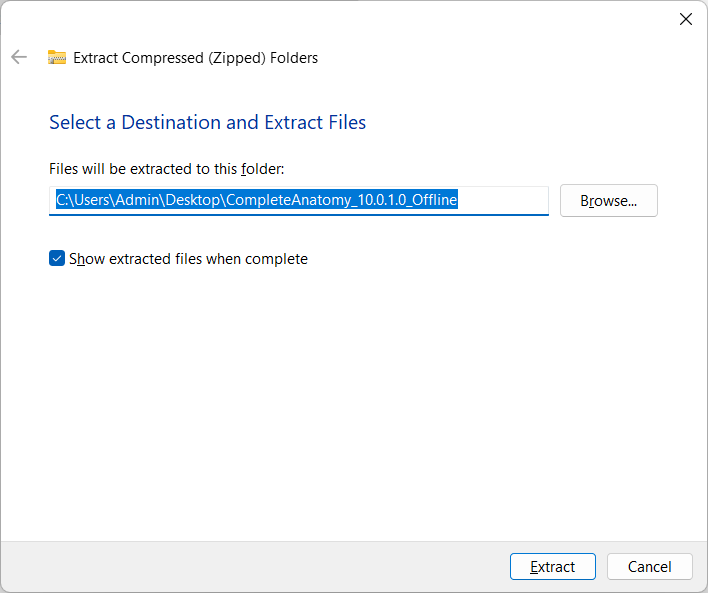
4.
En la ventana que se abre, asegúrese de que esté marcado Mostrar archivos extraídos cuando estén completos y luego haga clic en Extraer.
5.
Cuando se complete la extracción, se abrirán ventanas con los archivos necesarios para instalar Complete Anatomy en su dispositivo.
Nota: Si no marcó Mostrar archivos extraídos cuando esté completo en el paso 4, la ventana como en el paso 7 no aparecerá automáticamente. En este caso, debe ir a la carpeta Descargas y a la carpeta
CompleteAnatomy_Latest_Offline_x64. Tenga en cuenta que no debe haber un zip en el icono de la carpeta CompleteAnatomy_Latest_Offline_x64.
CompleteAnatomy_Latest_Offline_x64. Tenga en cuenta que no debe haber un zip en el icono de la carpeta CompleteAnatomy_Latest_Offline_x64.
Creando el paquete a través de SCCM
Nota: Si el asistente le solicita durante el proceso de creación de la aplicación que señale alguna dependencia, puede ignorar este paso ya que no se requieren dependencias.
1.
Una vez descargados los archivos, podemos implementar la aplicación a través de System Center Configuration Manager. En la consola de administración de ConfigMgr, vaya a Biblioteca de software > Administración de aplicaciones > Aplicaciones. Haga clic derecho y seleccione Creación de aplicación. Esto abrirá el Asistente para crear aplicaciones.

2.
Selecciona el paquete de la aplicación de Windows, un archivo con la extensión *.appxbundle que se encuentra en la raíz de la carpeta descomprimida, y especifica la ubicación del archivo. Haz clic en Siguiente.

3.
La siguiente página le mostrará que el archivo se importó correctamente. Si falta algún requisito previo en la carpeta en la que está almacenada la aplicación, verá una advertencia. Haga clic en Siguiente. Si ConfigMgr pudo identificar correctamente el appx/appxbundle más todos los requisitos previos, debería ver una pantalla similar a esta:
4.
En esta página puede especificar elementos como el nombre, el editor y la categoría administrativa de la aplicación. Utilice los siguientes datos:
Nombre: Complete Anatomy
Editor: 3D4Medical Ltd
Categoría administrativa: “Su propia elección”
Haga clic en Siguiente
Nota: No cambie la versión del software.
5.
Esta página mostrará un resumen de todas las configuraciones de las páginas anteriores del Asistente para crear aplicaciones. Haga clic en Siguiente.
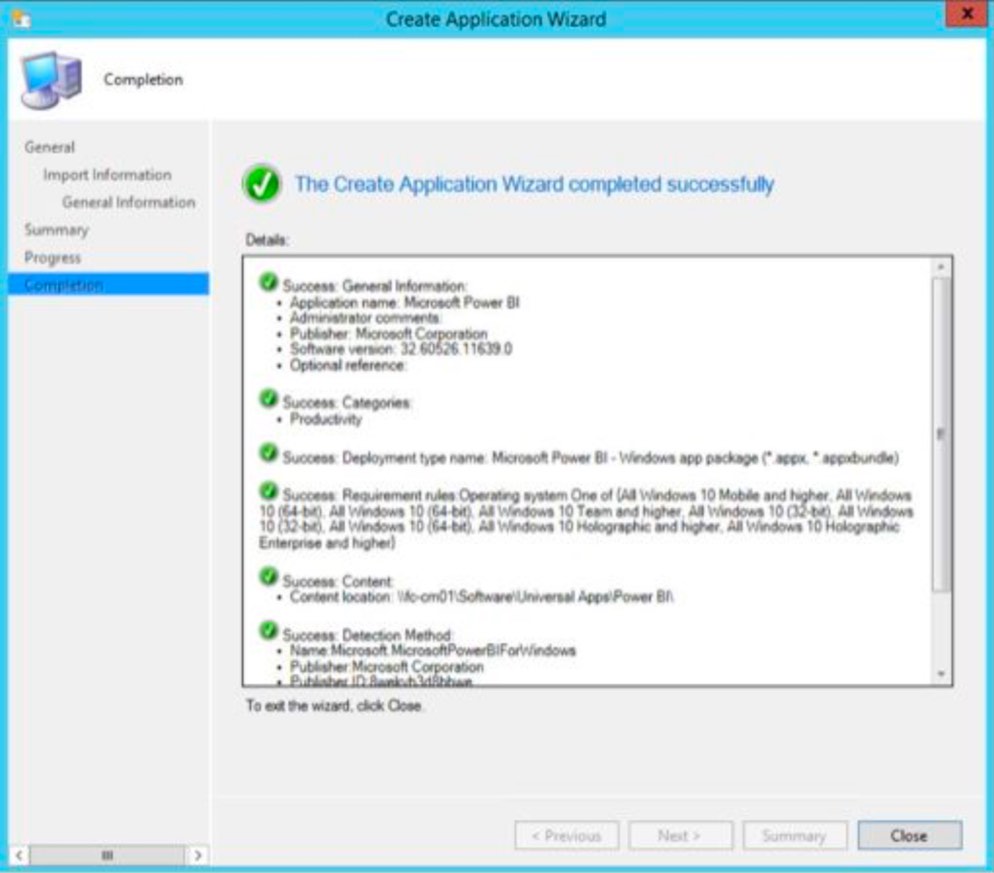
6.
El Configuration Manager comenzará a crear la aplicación Complete Anatomy. Una vez completado verá la siguiente pantalla confirmando que se ha completado:
Implementación del paquete a través de SCCM:
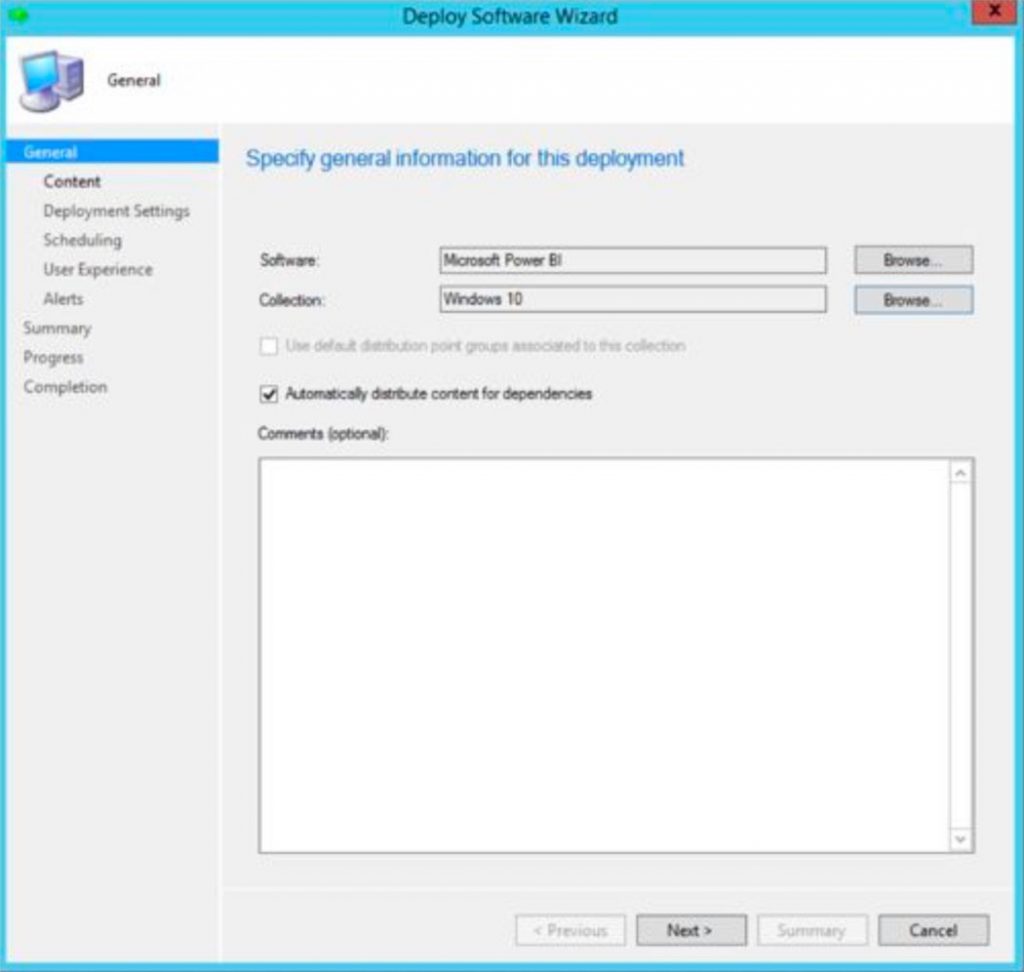
1.
En la consola de System Center Configuration Manager, haga clic derecho en la aplicación Complete Anatomy que acaba de crear y elija Implementar

2.
Elija una Colección para implementar la aplicación Complete Anatomy. En este caso, la aplicación se implementa en una colección de todas las máquinas con Windows. Haga clic en Siguiente.
3.
Elija un Punto de Distribución para distribuir la aplicación Complete Anatomy. Haga clic en Siguiente.
4.
En la página Configuración de implementación, elija si Complete Anatomy se implementará como Disponible o Requerido. Haga clic en Siguiente.
5.
En la página Programación, elija cuándo estará disponible la aplicación para que los usuarios la instalen. Haga clic en Siguiente.
6.
Sobre el usuario Experiencia de usuario, elija cómo se notificará a los usuarios sobre la instalación de la aplicación. Haga clic en Siguiente.
7.
En la página Alertas, elija si desea recibir alertas sobre implementaciones fallidas y alertas de System Center Operations Manager. Haga clic en Siguiente.
8.
La página Resumen mostrará una lista de todas las configuraciones elegidas para el Asistente para implementar software. Haga clic en Siguiente.
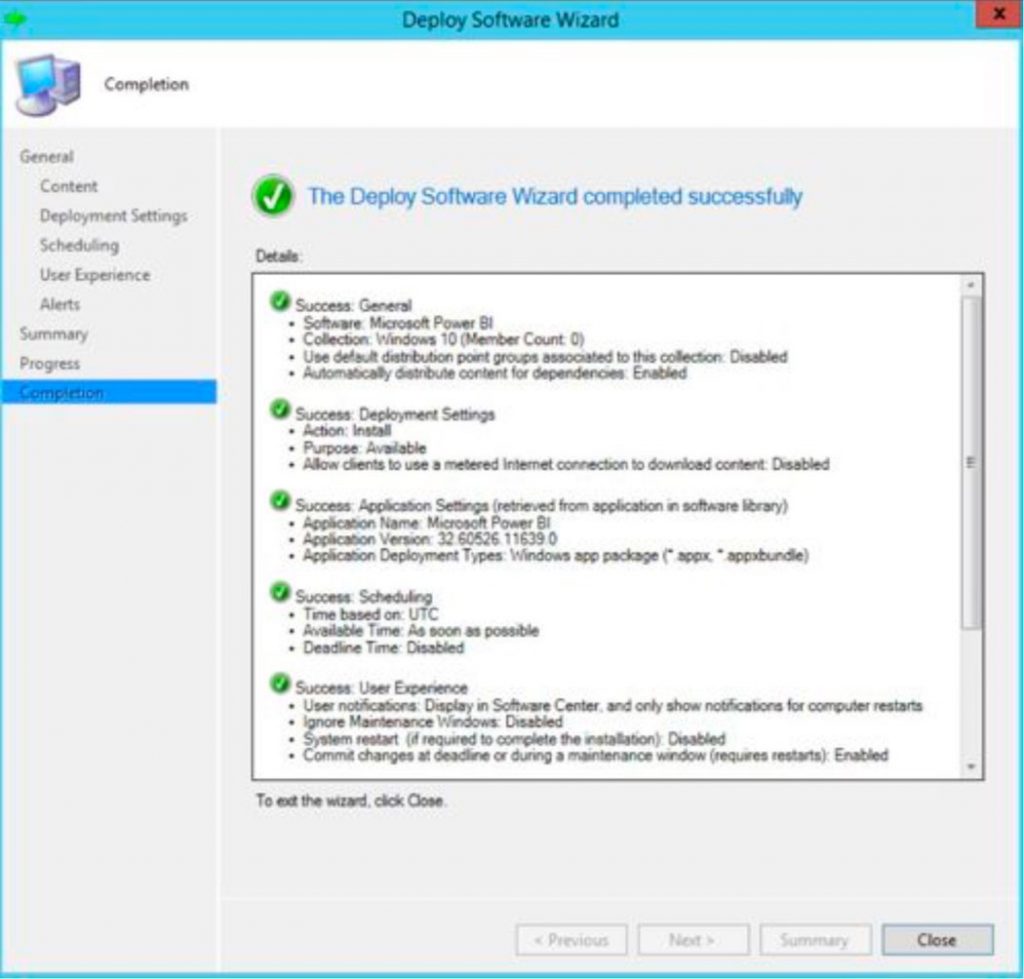
9.
El Configuration Manager comenzará a crear la aplicación. Una vez completado, debería ver esta página:
10.
Haga clic en el botón de Windows y abra el Centro de software. La aplicación Complete Anatomy ahora debería aparecer en el Centro de software.
11.
Haga clic en Instalar para instalar la aplicación.
12.
Complete Anatomy ahora debería estar disponible en el menú Inicio.