Hi, I’m James from Complete Anatomy, and I am going to show you just how useful Complete Anatomy can be in your physiotherapy practice.
We will go through the top 5 features which will make your life easier and give your patients a more visual understanding of their injury and treatment, thus improving patient compliance.
As an example, we are going to look at a rotator cuff injury, but keep in mind that this can be done for any body area.
Firstly, I am going to zoom into see the model more clearly. Initially, the model shows only the skeleton, so let’s add some muscles; I can select and hide any irrelevant structures, adding and removing structures until I have the setup I need.

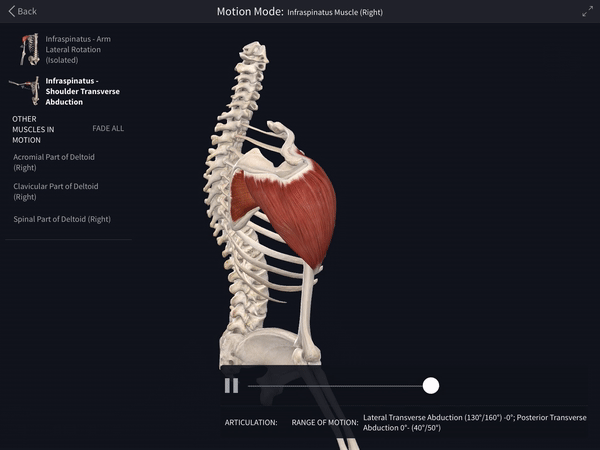
I now have the model view with the 4 muscles that make up the rotator cuff: infraspinatus, supraspinatus, subscapular, and teres minor muscles. I will only need to do this once, and then I can simply save it to my Library so that all I need to do next time is instantly access the Screen and load it.
Now that I have the model set up, I can explain to my patient the anatomy of the area. I can show them how these 4 rotator cuff muscles arise on the scapula, and insert into the head of the humerus. This will help them understand better how these muscles help to stabilise the shoulder joint, and allow it to abduct, and rotate internally and externally.
To draw my patient’s attention to a specific area of interest, I can use one of Complete Anatomy’s many Tools – the Pen. This allows me to highlight where their injury has occured.
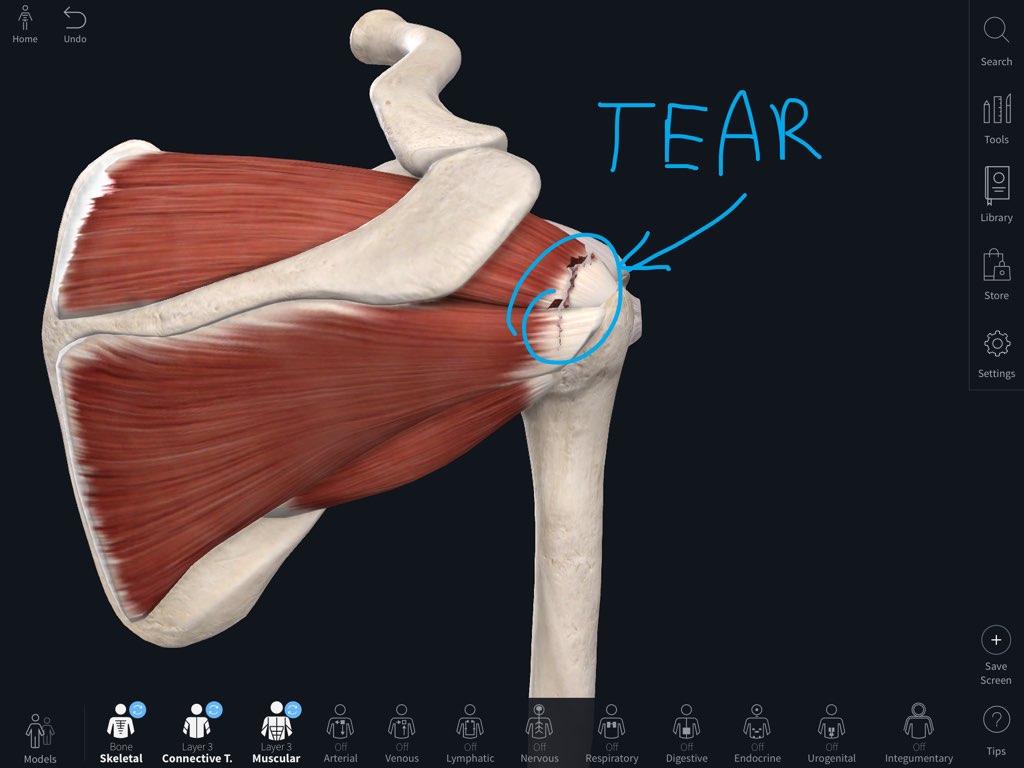
Next, I’ll want to demonstrate how that muscle moves, how the injury was caused, and why a certain action is causing pain. I simply select a muscle, and choose Motion from the menu that pops up. Depending on the injury, I can easily show the abduction movement or the internal & external rotation, and pause or rotate at key points. I can demonstrate for the patient how repetitive movements and impact trauma can cause impingement or tears to the rotator cuff. Using the fracture Tool, I can demonstrate a tear to the tendon of the supraspinatus muscle.
Now that I have explained the injury, to my patient, I will want to take them through their treatment plan.
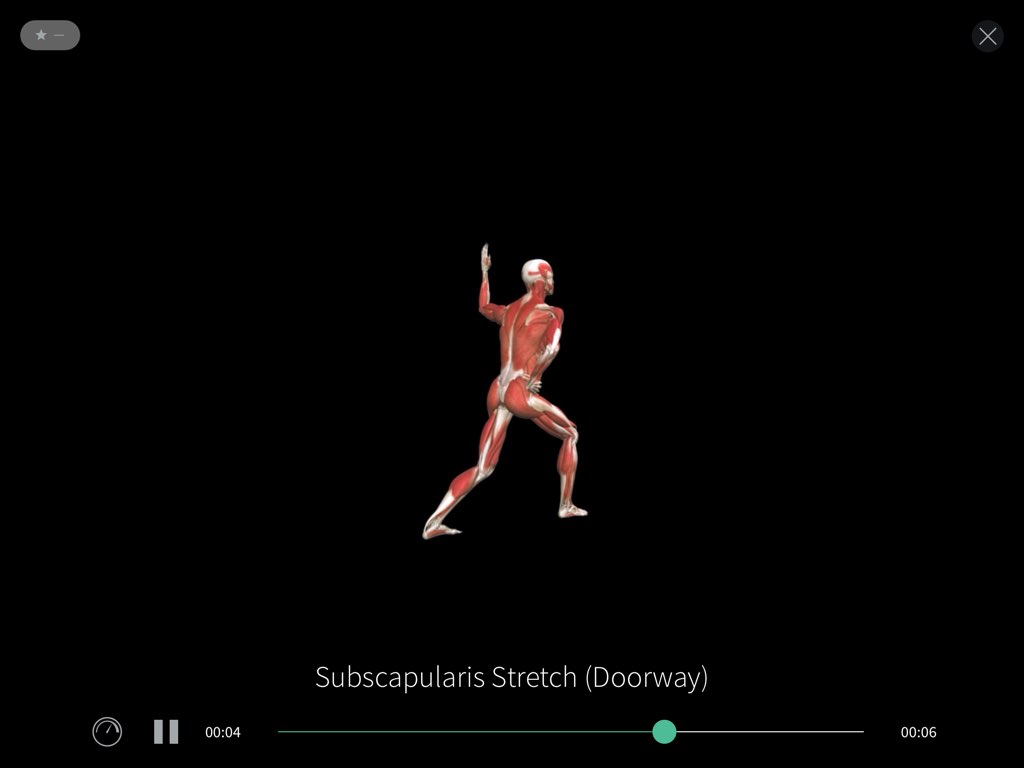
The Professional License in Complete Anatomy comes with over 900 exercise and stretching videos, including some great movements for strengthening and maintaining flexibility in the rotator cuff.
I can head over to the Library and choose Videos. Here, I am able to filter to the fitness category and choose either exercises or stretches, or I can simply search for a specific animation if I know its name (the subscapularis stretch in this case). I can even favourite that video for quick access next time.
And that’s it! My patient is armed with a 3D understanding of their injury, and clear instructions for their treatment. Complete Anatomy has made the patient-doctor experience quick, easy and effective.
There are many other tools available in Complete Anatomy which may be of use to your consultation, for example importing an x-ray, simulating growths and spurs in full 3D, adding labels, and visualizing pain to help your patient’s understanding.
The Professional License comes with a range of features to enhance patient education and improve patient compliance. Try it for free today, or head over to our pricing page to see more.